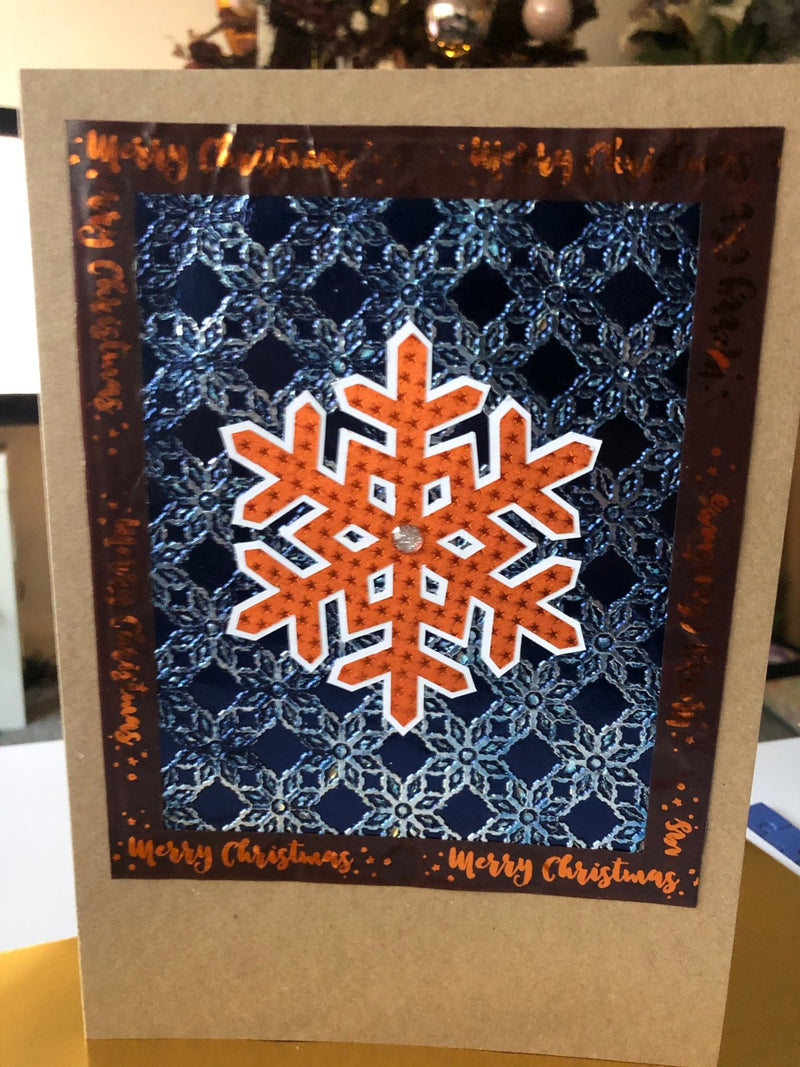
Embossed Christmas Card by Natalie Ballard

This month's projects are the last before Christmas, so I wanted to do a quick card idea. For those who have left it to the last minute; I know what its like, you've forgotten someone or left it as you were busy with work.
Shopping List
- Cobalt/Gold Glossy Foiled Paper
- Marigold Starstruck Foiled Paper
- Ghost Ink 2.0 and reinker
- Dovecraft Gems
- White Card
- Merry Christmas Washi Tape
- Background Embossing Folder
The Size
I've made a large card (7x10" which is big for me) for this process; but you could easily scale this to your card blank size.
Creating the embossed background
Cut a piece of Cobalt glossy foiled paper (new for 2020) measuring 6x8". Choose an embossing folder that fits your piece in its entirety; this is really important for this project. When embossing Rinea foiled paper, you don't need a shim or the full pressure of your machine. It's worth testing the pressure on a piece of scrap paper.
Run it through your die-cutting machine, and remove the folder from the machine. Protect your work surface with some scrap paper first. Working on a level surface, carefully open the folder not moving the foiled paper. Gently tap your Ghost Ink 2.0 pad across the raised surface of your foiled paper. By keeping it in the folder, we ensure the embossing doesn't flatten and avoid catching sunken areas. As the foiled paper is quite dark, leave it a little longer to develop. Then lightly spritz with water and wipe with a bamboo cloth. You may need to repeat this process for stronger colours (ebony and mocha in particular).


To tidy the edges, you can add a die cut frame or you can wrap the edges with washi/paper tape. I choose washi tape as the washi brings in the colour of our topper.

Decorating the Card
Using the new vinyl auto blade for ScanNCut DX machines, I cut a snowflake from the machine's built-in designs. This blade is a game changer for cutting Rinea; it was able to cut the Marigold starstruck foiled paper easily without tearing. Swapping to the standard blade, add an offset to your design and cut it from white card to add contrast.

Mount this onto your card using Stix2Anything 3D PVA, add a gem. Build up stamp blocks on top and leave it to set (this time will vary by glue and amount used).
Additional Options
You can also add additional colour to the Ghost Ink sections using alcohol markers. Here's an example here of where we added colour to a background embossing folder. It takes a while, but it does look great when it's all done.

You can also create your own sentiment embellishments using word dies or the built-in designs on your cutting machine.

Top Tip
If you do get some colour transfer off the foil onto your work surface all is not lost. You can get it off with some of the Ghost Ink reinker.