Raven Feather Wreath with Roni Johnson

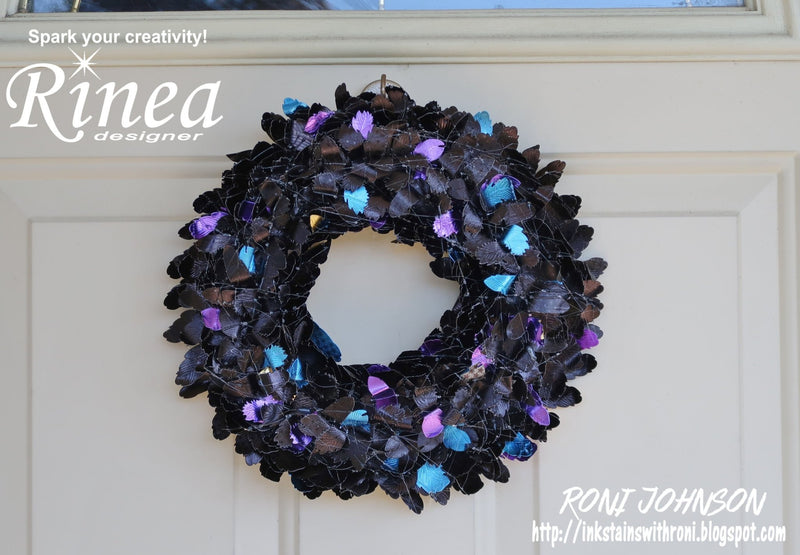
It's time to get your spook on! I have to say Autumn is my favorite time of the year and October also holds my favorite holiday...Halloween!! In the Halloween spirit, I decided to create a fun door wreath for the occasion - my Raven Feather Wreath.
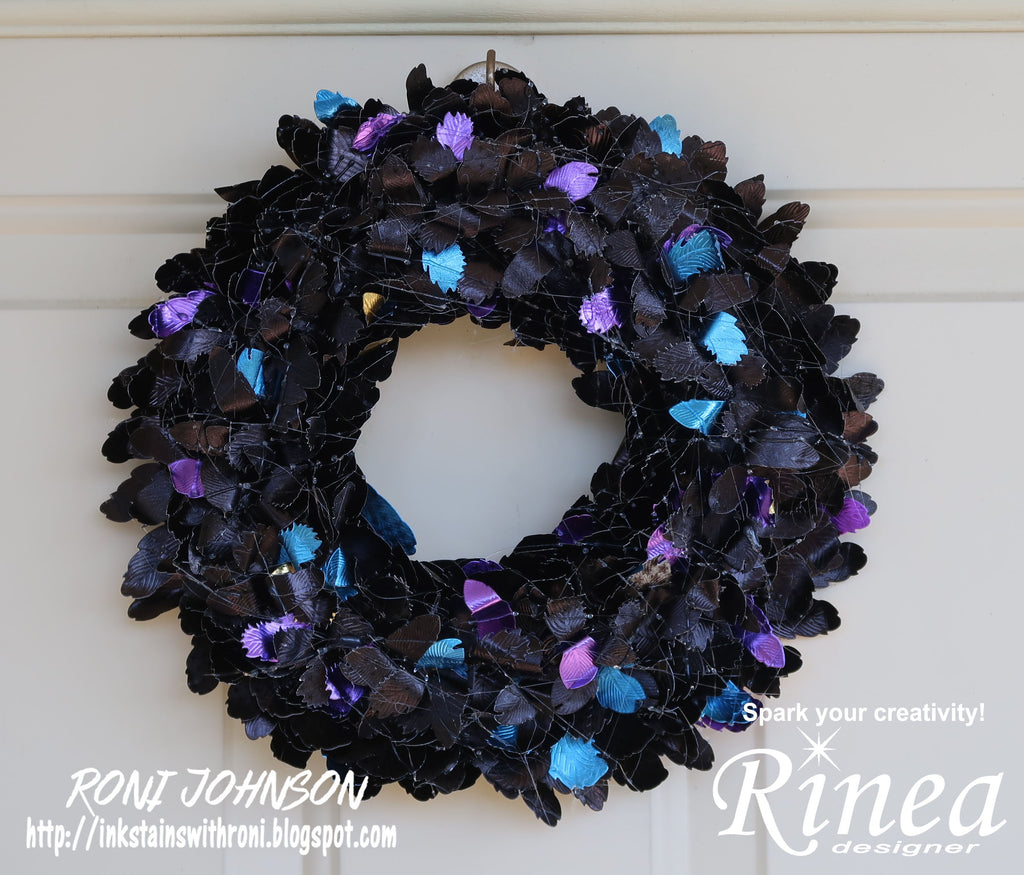
This wreath is made by cutting Rinea Ebony, Violet and Sapphire Foiled Papers in both the Gold Glossy and Starstruck varieties with Spellbinders feather dies. It may look a bit daunting but it really does go quite fast once you get into a rhythm.
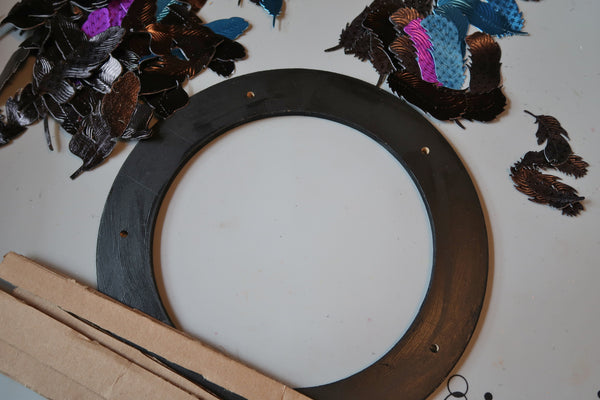
Step 1 - Paint a flat wreath form with black acrylic paint on the front and back.
Step 2 - Cut lots of feathers from Rinea Foiled Paper in several different sizes. I used the following colors for this wreath: Ebony/Glossy Gold, Ebony/Ebony Starstruck; Violet/Glossy Gold, Violet/Violet Starstruck; Sapphire/Glossy Gold and Sapphire/Sapphire Starstruck.
TIP: To make quick work of cutting the feathers you can cut 4-6 layers of foiled paper at one time. This really helps when you're working on a large project like this.
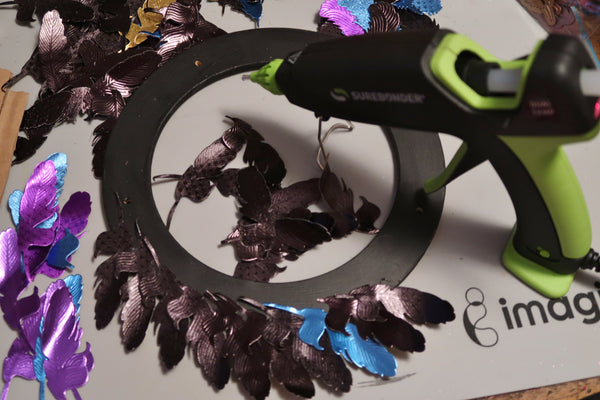
Step 3 - Use a hot glue gun to attach the largest feathers directly to your wreath form slightly overlapping the feathers as you add more.
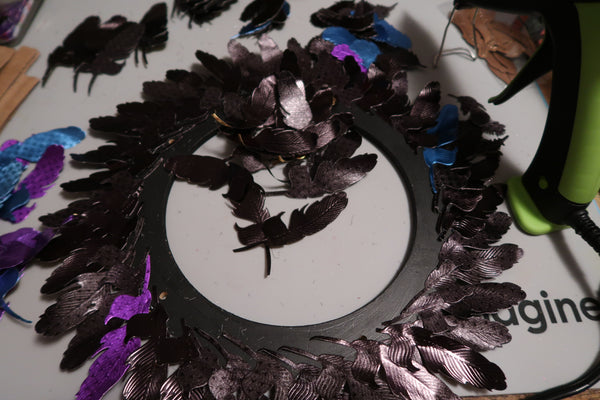
Step 4 - Once you have affixed feathers around the outside of the wreath use the same technique to glue feathers to the inside of the wreath.
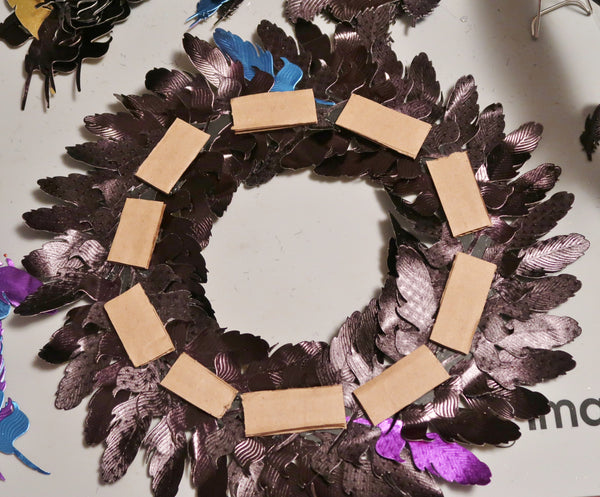
Step 5 - Cut strips of corrugated cardboard into 1" x 1.5-2" pieces. Affix these pieces to the center of the wreath form. This will give the next layer of feathers a lift.
Step 6 - Affix the second layer of feathers to the corrugated pieces just as you did the initial layer.
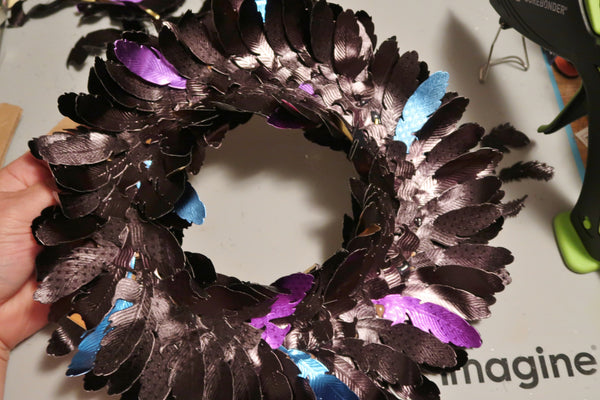
Note - As you add more layers the feathers will naturally start to curl upwards which is a good thing as it will help fill up the wreath to a nice rounded top.
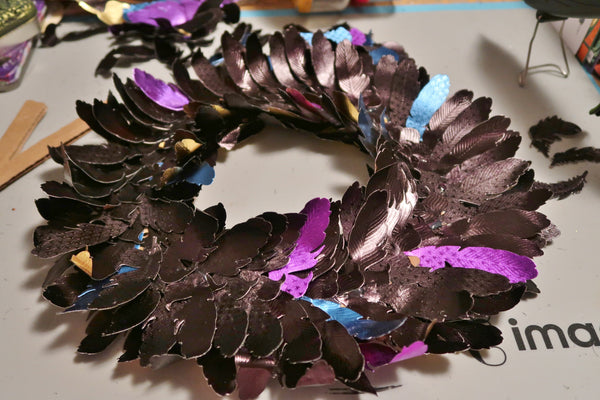
Step 7 - Continue to add alternating layers of cardboard strips and feathers using smaller feathers as you go. This particular wreath has 4 flat layers and a finishing layer that I tucked into the curled feathers to fill in any spots that I thought needed more body.
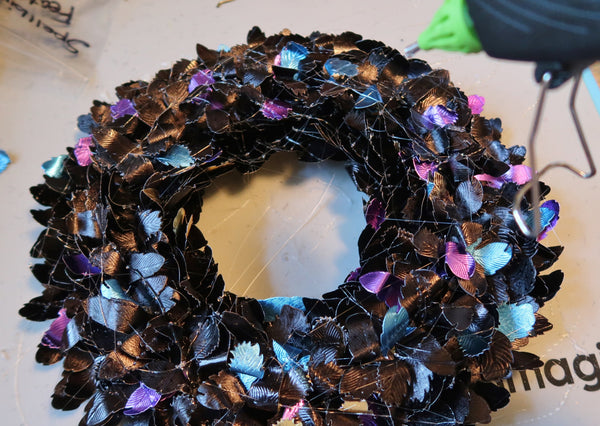
Step 8 - (Optional) To finish off the wreath and give it a "creepy" feel I added hot glue strings over the entire wreath. I tucked in a few spiders here and there for good measure.
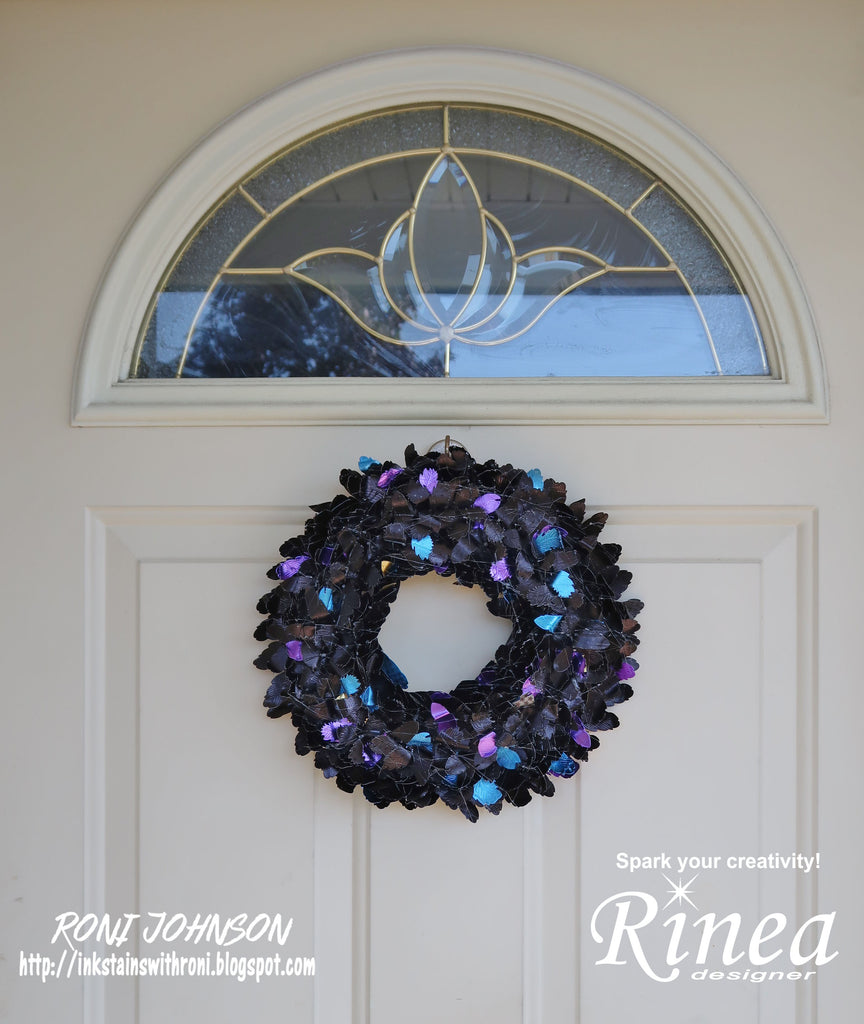
It will send chills down the spines of all of your visitors!
Happy Halloween Friends!
Supplies:
Rinea - Ebony/Glossy Gold, Ebony/Ebony Starstruck, Violet/Glossy Gold, Violet/Violet Starstruck, Sapphire/Glossy Gold, Sapphire/Sapphire Starstruck
MDF Flat Wreath
DecoArt - Black Acrylic Paint
Spellbinders - Feathers
Hot Glue Gun
MDF Flat Wreath
DecoArt - Black Acrylic Paint
Spellbinders - Feathers
Hot Glue Gun